SEARCH TOM'S BORING MORDHEIM BLOG

Pages

Forum

Paintservice

BTB

Thursday 18 November 2010

Banner up, people!

Hi guys,

A friendly visitor pointed out that I provided banners for download, but never actually explained how I applied them to models... lazy me.

So, to remedy that, here's a quick tutorial on how I used my banners. Hope that helps!
(click to enlarge)

Monday 4 October 2010

Speedpainting Space Marines #13 - Techmarine


Latest addition: A techmarine (courtesy of ebay). This model is normally available through direct mailorder only, and I think it is one of the coolest in the Space Marine range.

The puritiy seals are still missing, but other than that I think my speedpainting scheme worked well here too.

Enjoy!


Sunday 3 October 2010

Speedpainting Space Marines #12 - Dreadnought, Dreadnoughter, Dreadnoughtest

Hey guys,

A friend of mine recently drew my attention to an ebay auction for 2 "Assault on Black Reach"-Dreads, which were going for an extremely good price and so I couldn't resist.

I also recently bought the Blood Angels Codex, because I did not own any up to date Codex for my Space Marine army and decided that playing my custom Chapter "The Caliphate" as Blood Angels may be a little more interesting that going with the "vanilla" marines.

Plus, I have always wanted a dead cool Furioso Dreadnought stomping around at my command :)

Here I saw a chance to convert at least one of these machines from a standard issue "Assault on Black Reach"-Dread, by ordering a separate RIGHT powerfist arm from Bitzbox and replacing the "hand" with the one from the second dreadnought.

Without further ado, my PLASTIC Furioso Dreadnought (converted) and my "Tank Hunter" Dread with lascannon and missile launcher.

Enjoy,


The banner poles were made from toothpicks. The banners can be printed out here.


All three dreads!

Monday 27 September 2010

500g of lead

Hi guys,

Just a quick update to show you a model that I painted for a friend of mine who has recently started an orc army.

After having been away from the paintbrush for so long it's amazing how one still remembers all the moves :)

This guy was painted in a rather quick 3 hours (the standard on his back is not entirely done but other than that I think my friend Pat now has a fieldable general to crush my poor wood elves...)


Hope you like my version of Gorbad Ironclaw

Saturday 11 September 2010

Stuff For Sale!

Hi guys!


shipping is on me (free) worldwide!

So if any of the stuff below looks interesting to you, just pop me a line, I would be happy to hear from you!

ITEM #1 Dark Elf Army book for WHFB (7th and 8th edition)  SOLD

€10


ITEM #2 Red Blok Army for AT43SOLD

14 Krasnye Sodaty (nicely based, partially painted)
1 Sergeant Tymofiyeva (based & painted)
1 "Urod" Assault Strider with Colonels Odin and Manon (2 extra infantry miniatures) (based & painted)
3 Spetznatz Kolossus Battlesuits (based &  painted)
+ Free full color army book included!


ITEM #3 Warhammer army book EMPIRE SOLD


€10


Payment

I accept bank transfer or PayPal

Shipping/Postage

Shipping is free worldwide for all items!


Please contact me under tomspaintingservice [at] gmail.com if interested, I am looking forward to hearing from you!


Sunday 1 August 2010

Scratch made Painting Station

Hi guys!

A friend of mine recently started Warhammer (no doubt lured into it by the release of the new 8th edition of WHFB) and I thought I'd make him a little present - his imminent birthday being a perfect excuse.

I decided to make him his very first painting station, and thought it would be nice to share some pics. Enjoy!


Cutting out holes for water pots


Here I am making the handles on the sides of the tray. I cut out two holes and then joined them by carefully cutting out the middle section.

1 done, 1 to go

Eeeet voilĂ ! :)

I glued and screwed the parts together for max stability. I also smoothed all edges with sand paper. The overall result is really nice I think . Total cost: €4 (and that's counting glue and screws) + 2h assembly time.


Sunday 23 May 2010

Dipping sauce

 There isn't a hobbyist that hasn't at least once encountered this problem: after a while you own more unpainted miniatures than you can realistically hope to paint in your lifetime.

I am no exception to this rule, as I have amassed quite a lot of miniatures over time, most of which have too much sentimental value to give away, and yet I have never gotten round to paint them (completely/at all).

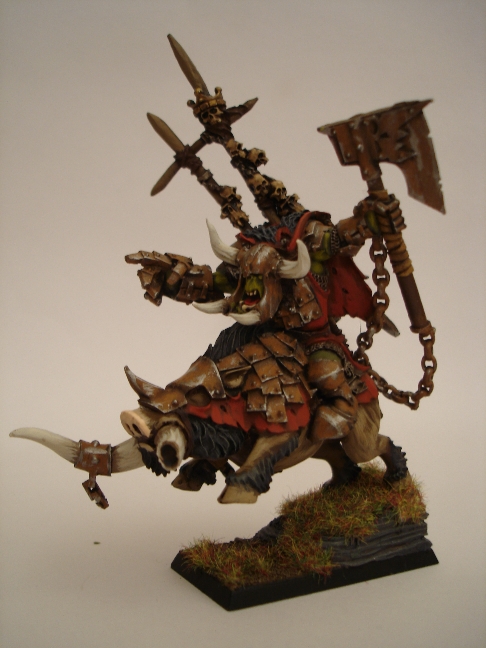
My old half painted collection of orcs and goblins. This was my second army and I had a lot of fun with it. The models are not exactly brand new (most of them 5th and 6th edition WHFB). In there are roughly 30+ boys, 16+ orc archers, 2 chariots, 2 catapults, 3 Stone Trolls, 10 Wold riders, 10 Boar Riders and 30 night goblins with fanatics.

I am a rather consciencious  hobbyist, and seldom does a purchased miniature wait for its paintjob, but considering the eternal problem of miniature quantitiy versus available painting time, one is hard pressed to finish every project one starts.

Yet I do not like to give up on projects. I feel that too much effort (and money) has (usually) gone into them to just let them rot in a drawer somewhere... for more than a few years :)

My space marines are a prime example for this. I think it was really worth the (reasonable) effort to completely remake them. It's incredibly satisfying to see a pile of bits coagulate into brand new army - and what's more, a pretty big one!

"But how do you deal with those heaps of plastic? Where do you find the time to paint them?"  I hear you ask.

A technique that has been around for a while now is "dipping". Like most people I first came accross it when I saw Fanatic Army Painter's "Quick Shade" products. At first, my artist's soul was offended. "That's not painting!" it cried, outraged.

But having thought about it a little, it started to kind of make sense. It is the quickest and easiest way to get many many minitaures done and onto the field of battle. Don't get me wrong, from an artistic point of view, the result is still nauseating. However the efficiency of the procedure is rather compelling. Plus: you have to admit it is a pretty clever idea.

So I decided to give "dipping" a try myself. And what better army to try it on than a massed, dirty horde of orcs? 


Here are my results and thoughts.


  • My shading solution is nothing more than regular "satin" or "matt" wood finish, rosewood shade. It's very cheaply available at your local home improvement store (around €6). 
  • I diluted it with  a little bit of water (you may want to try matt varnish as a better alternative) until I felt that it was the right thickness. I sacrificed two orcs in the process, but that's ok. They may be a little to dark but no-one will notice that if they are in the back of the regiment.
  • Despite being called "satin" the wood finish is a little bit too shiny for my taste. Dilution fixes that well enough to be acceptable.
  • I then painted my mini with simple colours. You just need to make sure to do a rather neat paintjob. I used VGC Camouflage green for the skin, VGC Leather Brown for the leather parts, VMC Off White for the teeth and bone. You can use any other acrylic colours that you normally use! (e.g. GW Snot Green, GW Snakebite leather and GW Skull white)
  • I based the models normally with sand
  • Let them dry completely.
  • Dipped them in the wood finish using clippers to hold onto their base.
  • Shook off the extra liquid into a cardboard box.

  • Let dry for an hour.
  • Done!


Here's an example of my test miniature:


Another nice feature is the relative stickiness of the wood finish while it is still wet. I sprinkeled some grass flocking onto the bases, and let dry. Saves white glue and  time and looks perfectly natural (not visible on picture)!

If you feel so inclined you can even go back and pick out some details like the teeth if you feel they have gotten too "flat" from the dipping: works brilliantly.

Overall I have to say I am pretty satisfyied with the result. Of course, it is a method of last resort for me, and looks 10x worse than a "properly" painted miniature, but if it allows me to get my orcs out of their box and onto the table in little time, and that they look acceptable at arm's length, I think it's a pretty good deal.

In particular for people who enjoy gaming more than painting I think this is a very cheap, effective and viable option to be considered.

Wednesday 14 April 2010

Speedpainting Space Marines #11 - Land Speeders

Hey guys!

I almost completely repainted my old (Ravenwing) land speeders a long time ago, but had to put painting completely aside for the last couple of months.

Yesterday I had some time and decided to quickly finish them up, that is, add the weathering.

The 3 land speeders are the final piece in my (now completed! Yay!) Space Marine army. Technically this is not completely true, since I still have 10 bikes that would like to get converted from Ravenwing to my new desert colour scheme, but I doubt that I will have the time to do them any time soon... so for now I'll call it an army and be happy and satisfied with what I have.

Here are the pics, enjoy!


Below you can see the un-weathered vs. weathered land speeder. I still need to do the weathering on the 3rd model.


Doing the weathering is actually extremely easy, quick and a lot of fun. As with all my other space marines, I used a 1:1 VMC Tierra Mate + Black mix to make the chipped paint (I used a medium brush and randomly stippled paint onto every spot that I though would have suffered attrition by heavy duty - you can see that I have started doing this around the cockpit of the left speeder). Then I used the same mix, and carfully drybrushed it horizontally on parts of the speeder that I felt should have been exposed to exhaust smore etc.
That's it!

Wednesday 17 March 2010

"The Caliphate" Space Marine Chapter BANNER FILES FOR DOWNLOAD!

Hey guys!

As requested, here are the banner files (.jpeg) that I made for my custom Space Marines Chapter for download!

If you feel like joining my chapter (for which I still need a cool name, so don't hesitate to write your suggestions as comments!) feel free to print them out and use them on your minis. Our chapter can use all the new battle brothers it can get ;)


Enjoy!
Tom

[UPDATE]: Thanks to Gert, I now have a name for the chapter! They shall henceforth be called "The Caliphate". Should you choose to become one of my battle brothers and join the chapter, feel free to add your tag to the Chapter's name. e.g. "The Caliphate of Gert".
The only condition I pose for joining, is that anyone who joins the chapter uses the above banners on his models and has fun playing! -Tom

Sunday 3 January 2010

Speedpainting Space Marines #10 - Land Raider Tank

And here we have the last model in this series of posts for now: the Land Raider! Every Marnie player probably owns one :)

Enjoy!


I added some extra fuel barrels to suggest that this land raider is intended for long trips accross the desert.


Unfortunately I lost the right projector light, so I had to come up with a solution to fill the gap. I added a shield with the chapter's insignia. Not the most elegant solution but better than a gaping hole.